Apple Provides Instructions to Fix macOS Reinstallation Errors on M1 Macs
Monday, November 23, 2020 7:39 PM
If you get a personalization error when reinstalling macOS on your Mac with Apple M1 chip
While reinstalling, you may get a message that an error occurred while preparing the update.

If you erased your Mac with Apple M1 chip before updating to macOS Big Sur 11.0.1, you might be unable to reinstall macOS from macOS Recovery. A message might say “An error occurred while preparing the update. Failed to personalize the software update. Please try again.”
Use either of these solutions to reinstall macOS. You should then be able to use macOS Recovery as expected when reinstalling macOS in the future.
Use a bootable installer
If you have another Mac and a suitable external flash drive or other storage device that you don't mind erasing, you can create and use a bootable installer for macOS Big Sur.
Or use Terminal in macOS Recovery
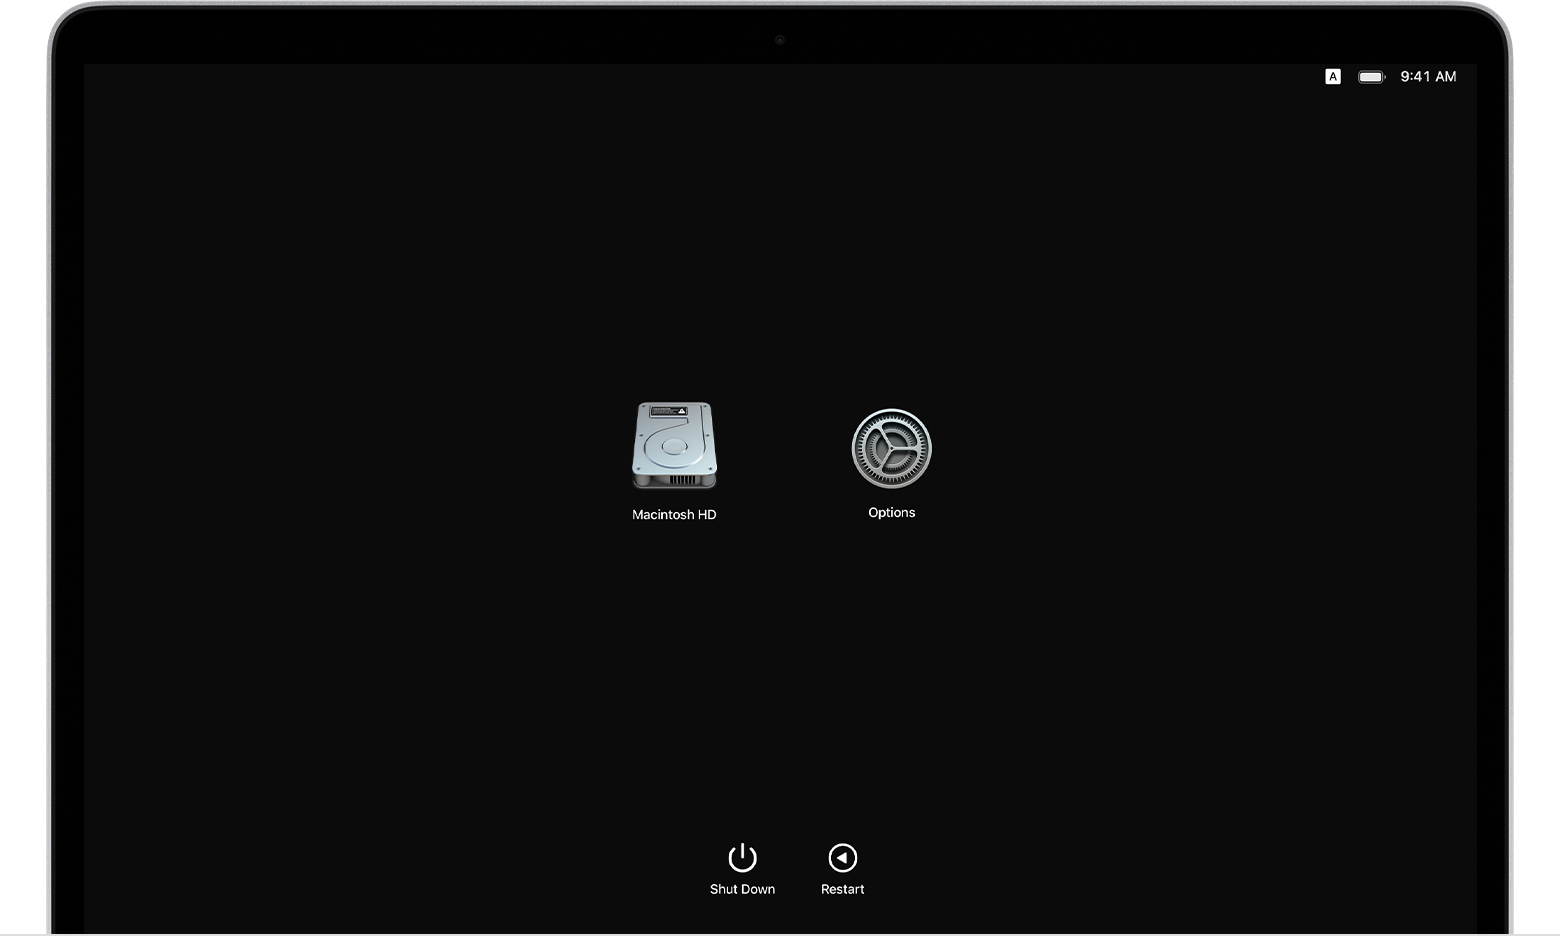
- Turn on your Mac and continue to press and hold the power button until you see the startup options window. Select Options, then click Continue.
- When you're asked to select a user you know the password for, select the user, click Next, then enter their administrator password.
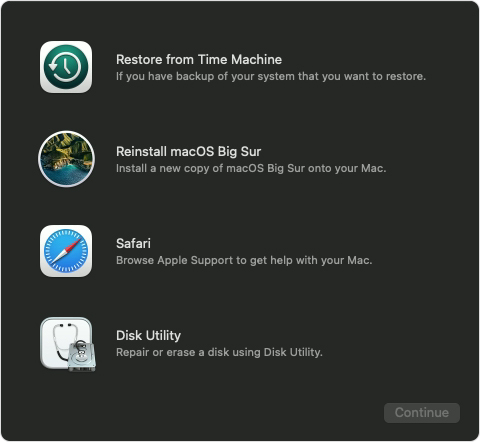
- When you see the utilities window, choose Utilities > Terminal from the menu bar.
- Type
resetpasswordin Terminal, then press Return. - Click the Reset Password window to bring it to the front, then choose Recovery Assistant > Erase Mac from the menu bar.
- Click Erase Mac in the window that opens, then click Erase Mac again to confirm. When done, your Mac restarts automatically.
- Choose your language when prompted during startup.
- If you see an alert that the version of macOS on the selected disk needs to be reinstalled, click macOS Utilities.
- Your Mac will begin activating, which requires an internet connection. When your Mac is activated, click Exit to Recovery Utilities.
- Select Safari in the utilities window, then click Continue.
- Open the article you're reading now by entering this web address in the Safari search field:
https://support.apple.com/kb/HT211983 - Select this block of text and copy it to the clipboard:
cd '/Volumes/Untitled'
mkdir -p private/tmp
cp -R '/Install macOS Big Sur.app' private/tmp
cd 'private/tmp/Install macOS Big Sur.app'
mkdir Contents/SharedSupport
curl -L -o Contents/SharedSupport/SharedSupport.dmg http://swcdn.apple.com/content/downloads/19/41/001-83532-A_LN5NT1FB2Z/o4zodwe2nhyl7dh6cbuokn9deyfgsiqysn/InstallAssistant.pkg
- Bring Recovery to the front by clicking outside of the Safari window.
- Choose Utilities > Terminal from the menu bar.
- Paste the block of text you copied in the previous step, then press Return.
- Your Mac now begins downloading macOS Big Sur. When done, type this command and press Return:
./Contents/MacOS/InstallAssistant_springboard - The macOS Big Sur installer opens. Follow the onscreen instructions to reinstall macOS.
If Terminal reports ”Volume not found"
If Terminal reports ”Volume not found” after entering the block of text above, enter this block instead:
cd '/Volumes/Macintosh HD'
mkdir -p private/tmp
cp -R '/Install macOS Big Sur.app' private/tmp
cd 'private/tmp/Install macOS Big Sur.app'
mkdir Contents/SharedSupport
curl -L -o Contents/SharedSupport/SharedSupport.dmg http://swcdn.apple.com/content/downloads/19/41/001-83532-A_LN5NT1FB2Z/o4zodwe2nhyl7dh6cbuokn9deyfgsiqysn/InstallAssistant.pkg